
Travel Vlog Video Editing: Workflow, Proxies & Colour Tips
Learn travel vlog video editing with tips on workflow, proxies, colour grading, and pacing to create engaging travel videos efficiently.
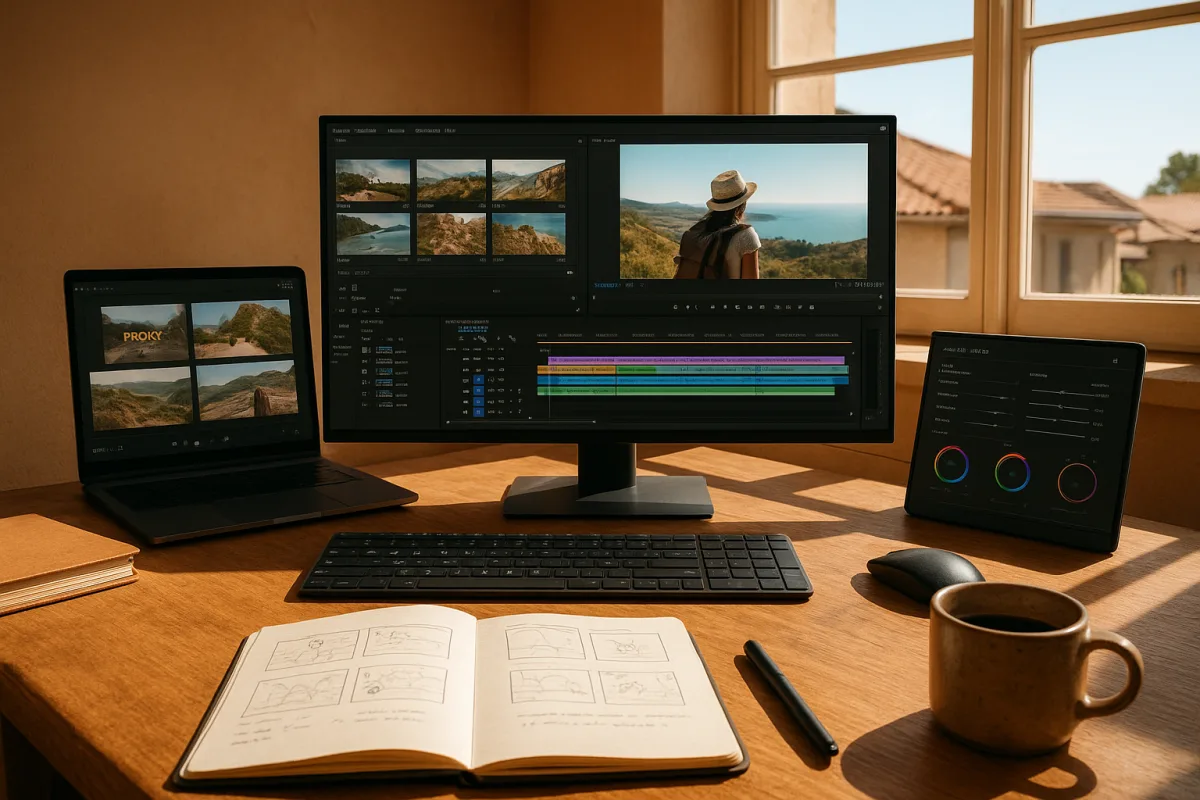
The useful number is 80 to 140 minutes per finished minute
Travel-vlog editing is often treated as a matter of picking an application, dropping in a popular song, and adding a few speed ramps. The more useful way to plan it is as a ratio: editing time per finished minute.
General YouTube editing averages roughly 45 to 60 minutes for each completed minute, according to EditVideo.io and Activids. Travel videos commonly demand more, around 80 to 140 minutes per finished minute. [16][17]
That means a 15-minute travel vlog can take 20 to 35 hours to finish. [16][17] For a creator publishing weekly, that figure is not a complaint about being slow. It is the production budget.
The number rises because travel footage arrives without the structure that a studio shoot has. A day may include a hotel room, taxi audio, a market, an accidental detour, a museum, sunset, food, and several versions of the same walking shot.
The edit is where those fragments become a journey a viewer can follow. Engagement is not created by making every clip stylish. It comes from deciding which clips answer the viewer’s next question, and which clips merely prove that the camera was running.
Where the time actually goes
The first cost is ingestion and selection. Travel creators often come home with hours of clips because recording feels cheap in the moment. Finding the usable ten seconds inside a three-minute handheld clip is not cheap later.
A workable first pass is not colour grading or music. It is logging footage by story function: arrival, orientation, obstacle, discovery, transition, reaction, detail, and payoff. That classification makes a timeline editable rather than merely chronological.
For example, a street-food sequence needs more than close-ups of food. It may begin with the decision to find a stall, show the confusing route or queue, establish the vendor, capture the order, then land on the reaction.
That structure is what gives the viewer a reason to stay through the B-roll. Without it, even attractive destination footage becomes a slideshow with background music. The research identifies weak story structure and slow openings as recurring engagement problems. [21][22][23]
The second large cost is trimming. A travel vlog normally needs enough geographic context to orient the viewer, but not every turn of the walk. The editor is constantly choosing between clarity and forward movement.
The practical test is simple: what changes in this shot? If the answer is location, stakes, information, mood, or a joke, it probably earns timeline space. If it repeats a point already made, it is usually cut.
This is why a 15-minute vlog can contain far less than 15 minutes of original action. The finished runtime is not an archive. It is a sequence of decisions designed to make the next moment feel worth watching.
The third cost is repair. Exposure changes between shade and sun. White balance changes between street lighting and hotel interiors. A useful spontaneous line may sit under traffic, wind, or a café grinder.
None of that necessarily calls for expensive hardware. It calls for leaving enough time to hear the problem, identify its source, and make a restrained correction. The research consistently flags inconsistent audio, background noise, and uneven production quality as avoidable viewer distractions. [22][23]
Build the story pass before the polish pass
The deadline-saving system is to separate editorial decisions from finishing decisions. Start with a rough story cut containing only the material needed to explain where you are, what you are doing, and why the next stop matters.
Do not add transitions during this pass. Do not chase a teal-and-orange look. Do not spend fifteen minutes cleaning a line that may disappear once the sequence tightens. These are common ways a straightforward edit becomes a long night.
A strong opening does not need a cinematic montage. It needs a quick promise. A delayed train, a difficult hike, a neighbourhood recommendation, a weather problem, or a specific meal can give the first section an immediate direction.
The research supports delivering value early rather than letting an opening drift. [21][23] There is no supplied evidence that quantifies the retention penalty for a slow opening, so it would be dishonest to claim a precise percentage.
Once the rough cut works, make a second pass for pacing. Walking footage may need only a few seconds before the viewer understands the street. Transit can be a bridge between story beats, not a complete record of the journey.
Use music to support those changes in pace, not to cover their absence. Audiodrome’s travel-music guidance distinguishes lighter music for walking sequences from steadier tracks for transit. [20] That is a useful editorial distinction, not a rule that every walk requires music.
Natural ambience deserves space as well. A market, ferry deck, rainstorm, or city crossing carries location information that a generic music bed cannot. Noise reduction should preserve intelligible voice while retaining enough local sound to keep the scene grounded. [19]
Proxies are a time-management tool, not a quality compromise
The 80-to-140-minute ratio becomes painful when a laptop cannot play the timeline smoothly. Stutter changes editing behaviour. Instead of judging an eight-second sequence, the editor waits through dropped frames and starts accepting cuts that should have been reconsidered.
This is where proxies earn their place. A proxy is a lower-resolution, easier-to-decode copy used while editing. The NLE links it to the original camera file, then uses the original high-resolution media for final export. [11]
That distinction matters. Proxies do not mean publishing low-resolution video. They mean making editorial choices from responsive playback rather than from a timeline that pauses every time it hits H.265 footage.
H.264 and H.265, also called HEVC, are common choices for 4K acquisition because they compress efficiently. They can also be demanding to decode during editing, particularly with long-GOP footage, multiple layers, effects, and a mid-range laptop. [11]
The research recommends an eight-core Ryzen 7 or Intel Core i7-class CPU, at least 32GB of RAM, a 1TB or larger SSD, and a mid-range GPU with 8GB or more of VRAM for video editing. [12][13] Those are useful targets, not guarantees of smooth playback.
Hardware acceleration can reduce export times by 40 to 60 percent in supported workflows, including systems using NVIDIA RTX 5000-series mobile GPUs and NVENC encoding. [12][13] That helps delivery, but it does not solve a confused story cut.
The hour-saving order is therefore: create proxies, make the rough cut, lock the sequence, then colour-correct and mix audio. Upgrading a computer before trying that order may improve benchmarks while leaving the actual bottleneck untouched.
Colour should preserve the place, not flatten it
Travel footage often contains the conditions that make automatic looks fail: hard tropical sun, blue winter shade, mixed indoor lighting, reflective water, neon streets, and sunset skies that already contain more colour than the timeline needs.
Start with manual white balance in camera where possible, and use a flat or log picture profile when the camera supports it and the creator is prepared to grade it. These choices preserve more flexibility, but they also create work later. [14][15]
In the edit, correct exposure and contrast first. Correct white balance second. Apply a creative LUT third, at around 50 to 70 percent intensity rather than assuming its default setting fits every shot. [14][15]
That order is mechanical, not aesthetic. A LUT transforms the values it receives. If a clip is underexposed or too blue before the LUT, the LUT often exaggerates the problem rather than solving it.
DJI’s official D-Log and DJI Natural Pro LUTs are identified in LumaKit Studio’s travel-footage guidance as options for compatible drone material. [15] They suit footage needing a starting transform, not a universal look for phone, action-camera, and indoor clips.
For bright water and skies, reduce contrast and protect highlights. For interiors, neutralise white balance before adding warmth. For sunsets, reduce saturation when needed instead of pushing every orange pixel harder. [14][15]
A tropical location can support warmer tones, a winter sequence cooler hues, and an urban night scene more electric colour. [19] Those are mood choices, though, not permission to apply one LUT across a whole episode regardless of changing light.
Choose software for the workflow you can finish
The supplied research covers five mainstream options, not every editor available in 2026. The right choice is the one that lets a creator organise, proxy, cut, correct, mix, and export without learning a new system during a weekly deadline.
Adobe Premiere Pro version 26.0 is the subscription option, listed at $19.99 per month, and it suits creators who need an established professional NLE with robust AI features and broader collaborative workflows. [1][2] The monthly price does not include a computer, storage, music licensing, or cloud services.
DaVinci Resolve suits creators who want professional colour grading and audio tools in the same application. The free version is available, while DaVinci Resolve Studio costs a one-time $295. [1][2] That purchase covers the software licence, not the storage and hardware demands of heavy 4K work.
CapCut is positioned as the more user-friendly option, with AI-powered features, a free plan, and an optional $9.99 monthly Pro plan. [3][4] It suits beginners and fast social-first editing, especially when vertical deliverables matter more than deep finishing control.
Final Cut Pro is tailored to Mac users and costs a one-time $299.99. [2][6] It suits creators committed to macOS who prefer a single-purchase professional editor, though that price does not include the Mac, external SSDs, or backup storage.
Adobe Premiere Elements is the simplified Premiere option, at about $99 as a one-time purchase. [1][5] It suits beginners who need a less complex route into editing, but the supplied research does not establish it as equivalent to Premiere Pro for advanced workflows.
These are reported feature and pricing positions from the cited software comparisons, not hands-on testing. No evidence in the research brief supports a comprehensive ranking of emerging or niche editing applications, so they should not be treated as the entire market.
Export for the destination, then make a separate vertical cut
A travel vlog can be engaging in the timeline and still look careless after export. The basic delivery rule is to match the frame rate of the source footage rather than converting 24, 25, 30, 50, or 60 fps without a reason. [7]
For YouTube, 1080p is the minimum useful baseline, while 4K is supported up to 3840x2160. Recommended upload bitrates are 8 Mbps for 1080p at 30 fps, 12 Mbps for 1080p at 60 fps, and 35 to 45 Mbps for 4K. [7]
For TikTok, make a dedicated 1080x1920, 9:16 timeline. Thirty frames per second is standard, while 60 fps can make motion smoother. Recommended 1080p bitrate sits around 8 to 15 Mbps. [8][9][10]
H.264 in an MP4 container is the standard export choice for both platforms. [7][8] TikTok’s stated upload limits include 287.6MB from mobile and 4GB from desktop, which can affect whether a high-bitrate vertical export is practical. [9]
The separate vertical timeline is part of the editing ratio, not a final button press. A wide establishing shot may not survive a 9:16 crop, while a reaction shot or food close-up may become much stronger vertically.
That extra work is worthwhile when it is planned. It is expensive when added after colour, audio, captions, and picture lock. The core lesson remains the same: spend the hours on decisions that move the viewer forward, then make the technical workflow support those decisions.
Frequently Asked Questions
How long does it take to edit a travel vlog?
Editing a travel vlog typically requires 80 to 140 minutes of work per finished minute. For example, a 15-minute travel vlog can take between 20 to 35 hours to complete. This time includes story decisions, selection, trimming, and repair, reflecting the complexity of turning raw footage into a coherent journey.
What is the best workflow for editing travel vlogs?
The recommended workflow starts with story decisions: establish the destination, the immediate problem or goal, and the next payoff before focusing on polish like color or transitions. Begin by logging footage by story function (arrival, obstacle, discovery, etc.) to create an editable timeline, then trim clips to maintain clarity and forward movement, and finally perform corrections and finishing touches.
How do proxies improve editing 4K travel footage?
Using proxy files allows editors to work with lower-resolution versions of 4K H.264 or H.265 footage, which improves playback smoothness and cutting speed on less powerful computers. The final export still uses the original high-resolution camera files, ensuring quality is not compromised.
What are the key steps in color grading travel videos?
Color grading should begin with one correction pass addressing exposure and contrast, followed by white balance adjustments. After these corrections, apply a LUT at roughly 50 to 70 percent intensity to enhance the look without oversaturation. This sequence helps maintain natural and consistent visuals across varying lighting conditions.
How should I structure a travel vlog timeline?
Structure the timeline around story functions rather than chronological order, grouping clips by arrival, orientation, obstacle, discovery, transition, reaction, detail, and payoff. This approach helps create a narrative flow that answers viewer questions and maintains engagement, rather than simply showing every clip in the order it was shot.
How we researched this
This article was assembled from 26 cited references.
Nothing here is based on hands-on testing. Where a figure or finding appears, it belongs to the source cited beside it, and the writing says so rather than implying otherwise. Every source is listed below so you can check it.
Sources
- Best Video Editing Software in 2026 | Toolradar
- Best Video Editing Software in 2026: Complete Comparison Guide | VideoEditingTips.pro
- CapCut AI Video Features: 2026 Review
- Best Video Editing Software in 2026 — 15 Free + Paid Tools
- Best Video Editing Software 2026 (Free & Pro)
- Best Mac Software for Video Editing in 2026 (Free & Paid)
- Best Video Formats for Social Media in 2026: YouTube,...
- TikTok Video Production Guide 2026: From Hook to Viral
- TikTok Video Size in 2026: Best Resolution, Safe Zones & Export Settings Guide
- TikTok Video Specifications Guide (2026) - postr
- Proxy Workflow: Edit 4K Videos Smoothly on Any Computer in 2026
- What Computer Specs for Video Editing? | Hardware Guide
- Hardware Requirements for Video Editing: What You Actually Need in 2026
- Color Grading in Premiere Pro: Complete Guide for Video Editors - Coloracci
- Best LUT Settings for DJI Pocket 3 and Pocket 4 Travel Footage – LumaKit Studio
- How long does it take to edit a YouTube video?
- How Long Does Video Editing Take? Real Hours by Type
- Essential Gear & Editing Tips for Perfect Short Travel Videos | Brand Beavers
- Video Editing for Travel & Lifestyle Creators (2026 Guide) | Remote Video Editing Agency | Color Grading | Editorial | Post Production | Motion Graphic | Animation
- Music for Travel Vlog Videos That Fits the Pace of the Journey
- 7 Video Editing Mistakes That Kill Your Click-Through Rate — Viralo Blog | Viralo
- Common Video Editing Mistakes Beginners Should Avoid | Bidmonline
- Common Video Editing Mistakes That Reduce Viewer Retention
- 10 common mistakes with duet videos (and how to avoid them)
- Vlog Cinematography: Techniques to Make Your Vlogs Look Cinematic – Hollyland Store
- Color Grading Travel Videos: Basics | Holiday Video Camera
Related Articles
Edit Video for Live Events
Learn how to edit video for live events with tips on timelines, proxies, codecs, syncing, and color grading for smooth, efficient post-production.
Edit Video for Social Media: Tips on Formats, Length & Color
Learn how to edit video for social media with tips on formats, length, proxies, and color grading for optimal engagement and platform compatibility.
Video Editing Techniques for Corporate Videos
Learn effective video editing techniques for corporate videos, including timelines, proxies, codecs, and color grading best practices.
Video Editing Workflow: How to Create an Efficient Process
Learn how to create a video editing workflow covering timelines, proxies, codecs, and color grading for smooth post-production.